Hi, I’m Alex. With over 15 years in the printing ink industry, I’ve handled hundreds of after-sales cases related to water-based gravure reverse printing. Among them, lamination bubbles are by far the most common—and the most costly.
The key point upfront: bubbles after lamination are rarely caused by “poor ink quality.” They almost always result from a mismatch between ink, printing, substrate, and lamination processes.
Four Common Root Causes of Lamination Bubbles
1. Incomplete Ink Drying (Most Common)
This accounts for over 60% of bubble-related issues. Water-based gravure inks rely on water evaporation. If residual moisture remains in the ink layer, it will expand rapidly under lamination heat and pressure, forming bubbles.
- Typical residual moisture target: ≤0.8%
- Problem cases often exceed 3%
Reducing dryer temperature or increasing press speed to meet deadlines is a frequent trigger.
2. Ink System Incompatibility
Mismatch between ink resin chemistry, substrate polarity, and adhesive system can prevent proper interfacial bonding. Air becomes trapped during lamination, leading to bubbles or even delamination.
- Water-based inks should match substrate polarity (PE, PP, PET)
- Avoid mixing water-based inks with solvent-based ink layers
- Ink and adhesive compatibility is critical
3. Substrate Surface Issues
Oil contamination, dust, or insufficient corona treatment prevents uniform ink wetting. Microscopic voids form between ink and substrate, which later expand during lamination.
- Recommended surface tension for PE/PP: ≥38 mN/m
- Edges are especially prone to contamination
4. Improper Lamination Parameters
Excessive temperature, insufficient pressure, or excessive speed can all contribute to bubble formation.
- Too hot: residual moisture flashes into vapor
- Too cold: adhesive fails to fully wet and cure
- Too fast: trapped air cannot escape
Step-by-Step Solutions That Actually Work
1. Optimize Drying First (Top Priority)
Drying control is the single most effective corrective action:
- Multi-zone drying: 60–70°C (pre-dry), 80–90°C (main dry), 70–75°C (stabilization)
- Typical gravure speed for PE films: 80–120 m/min
- Verify residual moisture using Karl Fischer testing
2. Match Ink Chemistry to Substrate and Adhesive
- PE / PP films: polyurethane–acrylic hybrid water-based inks
- PET films: acrylic-based water inks
- Prefer water-based or solvent-free adhesives
- Do not mix different ink brands without full system cleaning
3. Control Substrate Quality
- Ensure clean, oil-free film surfaces
- Corona treatment ≥38 mN/m for low-energy films
- Paper substrates: moisture content typically 6–8%
4. Fine-Tune Lamination Conditions
- Recommended lamination temperature: 70–80°C
- Pressure: typically 0.3–0.5 MPa
- Speed: 60–100 m/min, matched to printing output
- Adhesive coat weight: approx. 2.5–3.5 g/m²
Quick On-Site Diagnosis Tips
A simple method during troubleshooting:
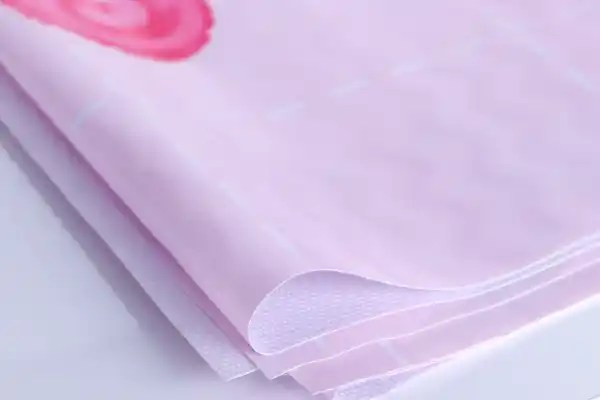
- Bubbles between ink and substrate → drying or surface treatment issue
- Bubbles between ink and adhesive → incompatibility or lamination settings
- Noticeable odor inside bubbles → residual water or solvent
Final Thoughts
In water-based gravure reverse printing, bubbles are rarely caused by a single factor. Small deviations—10°C in drying temperature or 20 m/min in speed—can lead to major losses.
Control drying, ensure system compatibility, maintain substrate quality, and tune lamination parameters. When these four elements are aligned, lamination bubbles can be completely avoided.
— Alex
15 years in printing ink technical service

Leave a comment